
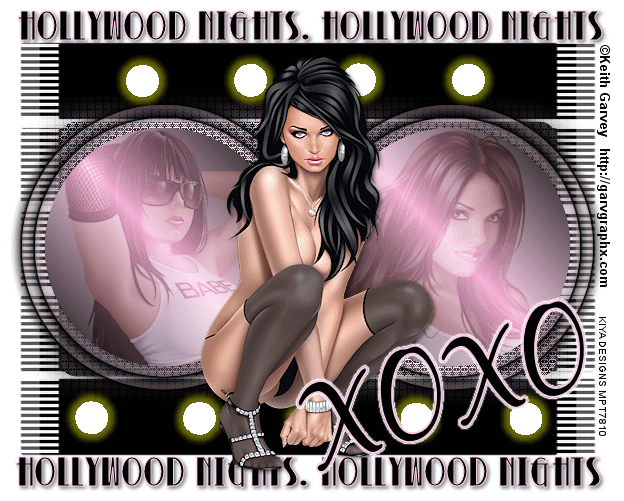
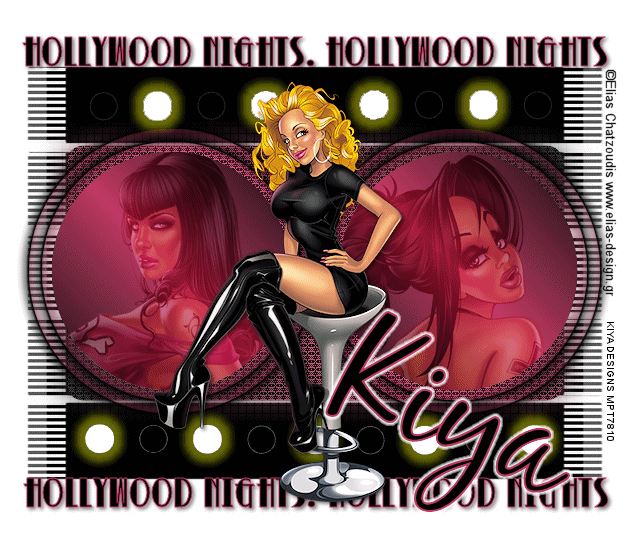
HOLLYWOOD NIGHTS
SUPPLIES NEEDED:
Three tubes of choice – I’m using ones from Keith Garvey. You must purchase or have a GARVEY license to use them.
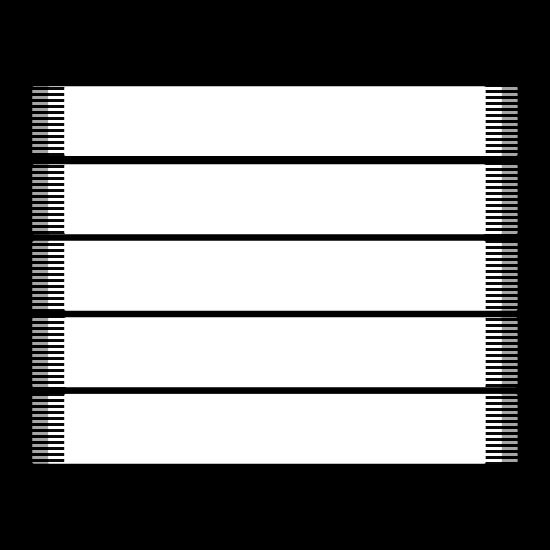
Template by Creative Misfit Creations – Click on link to download set 5th from top.
Mask by Vix Thank you! - Download HERE
Plug ins – Cybia Screenworks – Eye Candy 4000 (Gradient Glow) – Eye Candy 3.1 (Glow)
Fonts of choice or Betty Noir and Black Jack
Jasc Animation Shop 3
REMEMBER TO SAVE OFTEN!
1. Open template #2 from folder (after unzipped). Delete the topmost layer. Image – Canvas Size – Width 650, Height 600 – Color White.
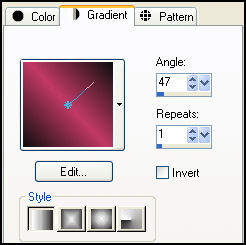
2. From your main tube – choose two colors of choice – make foreground the darker shade and background the lighter shade. Go to your gradients palette and choose foreground-background with these settings:
3. Make the big rectangle layer active. Selections – Select All – Float – Defloat. New raster layer and floodfill with your gradient.
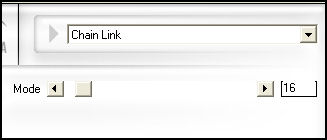
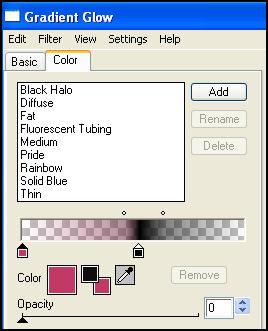
4. Keep selected. Go to Effects – Plug ins – Cybia – With these settings:
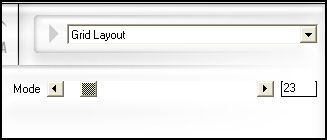
5. Keep selected. Effects – Plug ins – Cybia – With these settings:
6. Selections – Select None. Delete original gray rectangle layer.
7. Duplicate your floodfilled layer. Make the original layer active – Adjust – Blur – Gaussian Blur – 15.
8. Apply same effects used in Step 5.
9. Make your Circle Right layer active. Selections – Select All – Float – Defloat. New raster layer and floodfill with your gradient – same settings and color as before.
10. Keep selected. Delete original gray circle layer. Copy and paste your tube of choice as new layer. Position in selected circle until as desired. Selections – Invert – Delete.
11. Double click on tube layer and from blend mode drop down menu, select soft light.
12. Merge down tube and circle layers together. Effects – Plug ins – Eye Candy 4000 – Gradient Glow – Black Halo - with these settings:
13. Repeat Step 12 to get the ‘double-frame’ effect.
14. Repeat Steps 9 to 13 with Circle Left. [You can delete the star layer as we won’t be needing it]
15. Copy and paste your main tube as new layer and position in the middle (or where desired). Add light drop shadow of choice. Make sure the tube is ABOVE the gray dot layer. Close this out so we can work with our dots.
16. Our gray dot layers seem a bit too close to the main part of the tag, so let’s push both upwards and downwards a bit, respectively.
17. Merge down these two layers. Selections – Select All – Float – Defloat – Floodfill with black. Duplicate this layer twice. Close out copy and make original dot layer active.
18. With your magic wand, select every other circle like so:

19. Selections – Modify – Expand by 1. New raster layer – flood fill with white.
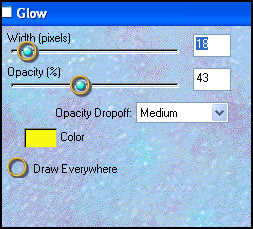
20. Effects – Plug ins – Eye Candy 3.1 – Glow with these settings:
21. Close out this layer and repeat Steps 18 to 19 on the duplicate layer – only this time, make sure you’re selecting the circles you did not select for the original layer.
22. All done? Great! Make your background layer active. New raster layer, floodfill with color black.
23. Open mask provided or your choice (although effect would work better with the mask given) – and apply to layer.
24. Make your topmost layer active (you can open your main tube now if you want). Choose your text tool, and with foreground set to light color from your tube and background on black, write out phrase of choice or in my case ‘Hollywood Nights’ as many times as can fit with these settings:

** Apply light drop shadow of choice.
25. On new raster layer, add your name with text of choice, copyright and license information.
26. Time to get animated!
27. Close out one of the dot layers. Copy merged and paste as new animation in AS.
28. Back to PSP. Open the second dot layer and close out the first. Copy merged and paste after current frame in AS.
29. Edit – Select All – Animation Properties – Opaque – White. Animation – Frame Properties – 40.
30. View animation and you’re all set! Hope you enjoyed the tutorial.
Please no hotlinking the images! Neither can you use the tags created for your personal use or on blogs or websites without written permission. This tutorial is registered with TWI.
© KiyaSama - all rights preserved. Tutorial Written 23rd June, 2009.
Tutorials Home
|
|