
GROOVY

SUPPLIES NEEDED:
3 tubes of Choice – I’m using the work of the fantastic Keith Garvey. You must purchase or have an GARVEY license to be able to use it.
You’re also welcome to use any other tube of your choice.
Fabulous FTU scrapkit called A Bit Groovy from Scrap Dimensions. Check out her freebies page for it.
Mask – This comes with your Corel PSP program, but just in case you don't have it, you can
download it here
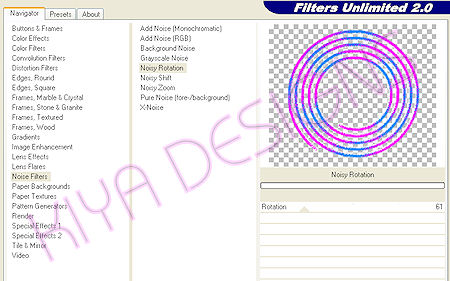
Plugins – Filters Unlimited 2.0 – Noisy Rotation
You can purchase plugin here
Font of choice – I’m using Bauhaus93.
Animation Shop 3
1. Open transparent image, 700x600. Floodfill white and merge down to form background layer.
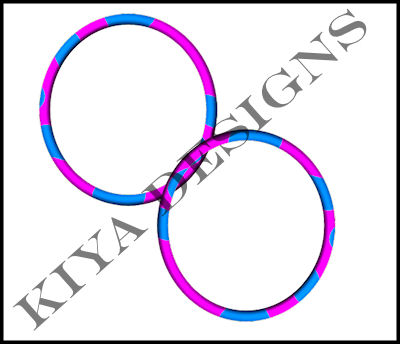
2. Open up Frame 2 from the scrapkit. Paste as new layer and resize by 50%. Move this a bit higher up your image and duplicate, flip and mirror. Move to the right side of first frame and arrange and merge down, so you have something like this:
3. Using your magic wand, making sure that ‘mode’ is on ‘add(shift)’ and holding down the shift key – select inside the frames – selections, modify, expand by 3. Select Paper 6 – paste as new layer, invert and delete. Select none.
4. Go back to your frame layer, select, expand by 5 and now paste close ups of two of your tubes – we want mainly the faces displayed – as new layers. Move them both so each fits a frame.
Selections, invert, delete – making sure you change layers of each tube so excess is cropped out.
5. Merge down and move tube layer beneath the frame layer. Add dropshadow, 2,2, 50,5. Add same drop shadow to the frame layer.
6. Close out white bkg layer and merge visible. Duplicate and on original layer, mirror and move tubes in such a way that it looks as if it’s crisscrossing the original (making sure you can still see parts of the tubes faces). Lower opacity to 44%.
7. Choose Paper 7 from the kit, paste as new layer above white bkg. Apply mask, delete, ungroup layers. Add drop shadow – same as we used above.
8. And now time to embellish your tag! I used Pendant 2, paste as new layer at the top of your tag, resized by 50% and moved it to the top frame – erase a bit of it so it looks as if it’s wrapped around the frame. Add light drop shadow. Also made use of Groovy Shoes 2, paste as new layer, resize by 50% - see my tag for reference. Drop shadow.
9. Choose daisy 2 and 3. Resize them by 50% and 40% respectively – merge down and move beneath the shoe layer. Duplicate and resize by 70% - arrange near frame – see my tag for reference. You can add even more embellishments to your tag. Have fun with it!
10. Add your main tube as top layer on your tag – move to the left and apply drop shadow.
11. I chose the word art ‘Groovy’ – resize to about 70% and move below main tube. Add light drop shadow 1,1, 50,5.
12. Add name, copyright and license info – font used is Bauhaus93, size 72 – foreground on black, bkg with a light color from your tag – 2.0. Add light drop shadow.
ANIMATION TIME!
13. By now, you should know how my animation thing works, so hopefully my quick explanation isn’t too confusing. Go to the mask layer…duplicate twice to end up with 3 layers.
14. Close out top two layers. On original, go to plugins, Filter Unlimited 2.0, Noise Filters, Noisy Rotation, rotation 61.
15. Close out this layer, open up the next layer and set rotation to 81. Close out this layer, go to the next and set rotation to 101.
16. Close out top two layers, go back to original open and copy merged and paste as new animation in Animation Shop.
17. Repeat Step 16 for the next two layers and when done, you should have three frames in AS. Select all – animation properties, opaque – white, and then view animation, and you’re all set!
18. Below is another version, using different colors and elements from the same kit.
Hope you liked the tutorial and please feel free to email me with your results or any questions you might have.
Email to: kiyasama@yahoo.com
Please no hotlinking the images! Neither can you use the tags created for your personal use or on blogs or websites without written permission.Tutorial has been registered under TW1.
© KiyaSama - all rights preserved. Tutorial Written 19th March, 2009.
Tutorials Home
|
|