
GOTH SOUL
SUPPLIES NEEDED:
2 Tubes of Choice – I’m using fabulous ones from Jessica Dougherty. You must purchase or have an CDO license to use them. You’re also welcome to use other tubes of choice.
Awesome new FTU scrap kit from Doris called ‘Goth Soul’ – you can download it from her blog – SCRAP DIMENSIONS
Masks from Weescotslass and Vix PSP - HERE and HERE
Plug ins – Eye Candy Nature - Fire – HERE
Fonts of Choice
Animation Shop 3
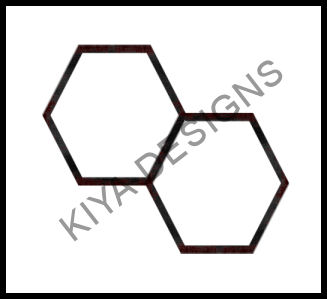
1. Open Frame 3. Copy and Paste as new layer. Resize by 35%. Move a little upwards and towards left side of tag. Duplicate, mirror, flip and arrange to make it look like so:
2. Merge down. Magic wand. Select inside frames, holding down the shit key while doing so. Selections, Modify, Expand by 3. Select Paper 2. Resize by 60%. Selections, invert, delete. De-select. Move paper layer beneath frame.
3. Select frame layer. Magic wand (top frame), click and expand by 3 again. Paste your first tube. Selections, invert, delete. Move tube below frame layer. I’m using the same tube, only this time I mirrored it on it’s original layer, before repeating the steps above on the second frame. You’re welcome to use a different tube of choice for this.
4. Merge down tube layers and apply light drop shadow.
5. Open Cross 4. Copy and paste as new layer. Resize by 50%. Leave as is in middle of image tag. Apply drop shadow.
6. Open Paper 3. Paste as new layer above white bkg layer. Apply mask (VixMask181), delete, ungroup. Resize if needed.
7. Open Paper 7. Paste above white bkg layer. Apply mask (WSLMask218), delete, ungroup. Resize if needed.
8. Copy and paste main tube as new layer. Resize if needed and move to left side of tag. Apply drop shadow.
9. Now you can add as many elements as you like or see my tag for reference. Have fun with it!
10. If you used the two candles (as in my tag), then you can continue on with the animation below. However, if you don’t want to animate, you’re welcome to finish up by adding your name, copyright and license info. Save and you’re all set.
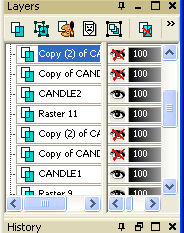
11. For the animators (yay!), rename the candle layers ‘CANDLE1’ and ‘CANDLE2’. Duplicate each layer twice, so you have a total of three (for each that is).
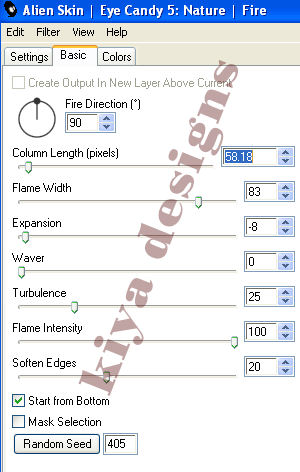
12. Starting off with CANDLE1, close off top two layers – on original layer, using your freehand selection tool, draw around the flame. Apply your plugin- Nature-Fire-Small Candle- on these settings:
13. Close out this layer, move to the next, open layer and click on random seed twice. Remember not to de-select! Repeat this process for the last layer. Once done, deselect.
14. And then repeat from step 12 for CANDLE2. [Hopefully that isn’t too confusing]
15. Now add your name, copyright and license info, and off we go to animate!
16. Close off top two layers of each CANDLE1 and CANDLE 2. Copy merged and paste as new animation in AS.
17. By now, you know the drill, only this time, we’re dealing with two layers, so don’t forget to close off the right ones. It should look like this:
18. Once you have your three layers in AS, edit, select all, view animation and you're all set!
19. Hope you enjoyed the tutorial. ^___^
Please no hotlinking the images! Neither can you use the tags created for your personal use or on blogs or websites without written permission. Tutorial has been registered under TW1.
© KiyaSama - all rights preserved. Tutorial Written 4th April, 2009.
Tutorials Home
|
|