
CRANK THAT!
SUPPLIES NEEDED:
A tube of choice – I’m using the hunkalicious one from Elias Chatzoudis. You must purchase or have a ELIAS license to use them. You’re also welcome to use a tube of your choice.
Plug-ins – Gokoh 0.1.1 from Penta – Download HERE
(Note that Gokoh cannot be added to your plugin folder! It’s a separate application, so should be opened in a new window)
Mask by Weescotslass
Fonts of choice or – Trashed, Poor Richard
Animation Shop 3
1. Open transparent image – 600 x 500 – flood fill white and merge flatten to create background.
2. Foreground on black, background on null, go to preset shapes, rectangle and draw out a rectangle to fill the middle of the image. Objects, Align, Center in Canvas. Convert to raster.
3. Using your magic wand, click inside the rectangle. Selections, modify, expand by 3.
4. Choose a light color from your tube (I’m using #528098) and set as foreground color. Create new raster layer, flood fill with this color. Selections, invert, delete. Move this layer beneath the black ‘frame’.
5. Open up your Gokoh program.
6. Back to your PSP program, with the flood filled layer active, copy – go back to your Gokoh program and click the paste button. Your layer will now be in the box. Using your cursor, move the lines so it’s pushed towards the bottom of the box – move sliders to this setting:
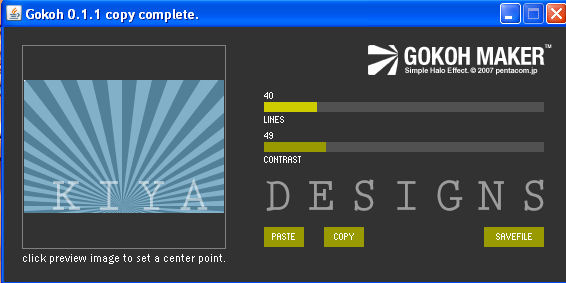
7. Press the copy button, go back to PSP and paste as new layer on your image. Go back to Gokoh, move the LINES slider up to 63. Copy and the paste as new layer in PSP. Repeat this one more time, moving your LINES slider up or down (doesn’t matter). Paste as new layer in PSP.
8. You should now have three Gokoh layers and your original dark flood filled layer. We don’t need this one anymore, so you can go ahead and delete it.
9. Back to your black 'frame', magic wand, click inside the rectangle, expand by 3, copy and paste your tube as new layer, move to left side of tag. Resize if needed. Selections, invert, delete. Add light drop shadow of choice.
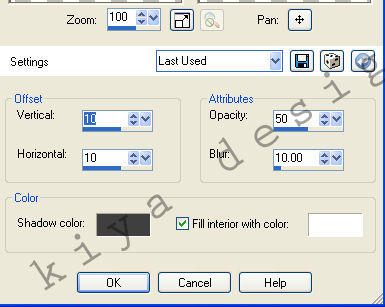
10. Go to your black ‘frame’ go to Effects, 3D Effects, Cut-Outs on these settings:
11. Apply drop shadow of choice.
12. Now go to your brushes. You’re welcome to use the ones I used, or any other from the brush set. Set foreground on black and stamp out as many as you want on these settings:

13. For the girl, I used a different color (red), but you’re welcome to play around with whatever color you want.
14. All done? Great! Now it’s time to add a phrase of your choice. On a new layer, I wrote ‘CRANK’ in honor of the new movie coming out soon *lol* Font – Trashed, foreground null, background, white, size 72, kerning 50, floating.
15. I also added my name to the top of the tag on a new layer with these settings:

16. Add your copyright license/info and then it’s time to animate!
17. By now you should know how this is going to work, if in doubt, you can check out my other older tuts for how it’s done.
18. Hope you had fun with this one. Hey, even guys need a cool looking tag now and then. ^_~
Please no hotlinking the images! Neither can you use the tags created for your personal use or on blogs or websites without written permission. This tutorial is registered with TWI.
© KiyaSama - all rights preserved. Tutorial Written 6th April, 2009.
Tutorials Home
|
|