
BEAUTY
[How to Use the Mesh Deform Tool]
SUPPLIES NEEDED:
Paint Shop Pro 7 and up
An image of choice – I’m using one by Olivia. You must purchase or have a CDO license to use it. You’re also welcome to use an image of your choice as long as it will work well with the effect we're going for.
Word Art by Me - HERE
Font of choice
Elements or brushes of choice
REMEMBER TO SAVE OFTEN!
1. Open image of choice. Go to Image – Add Borders – Color Black – Symmetric box checked – value 1. Click OK.
2. Go back to Add Borders – Color White – Value 5. Click OK. Add Borders again – Color Black – Value 1. Apply. Add Borders – Color White – Value 10. Apply. Add Borders one last time – Color Black – Value 1.
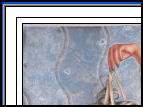
3. You should now have a border looking like this:
4. Choose your magic wand and click on the very first border around your image. You should having marching ants like so:
5. On your materials palette, click on the foreground color box and go to your gradients tab. Search for the gold gradient (should automatically come with your PSP program) – Angle and Repeat at 0 and apply.
6. Flood fill the selected layer with this gold gradient.
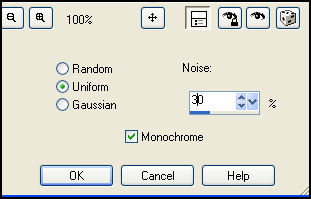
7. Keep selected and go to Adjust – Add/Remove Noise – Add Noise with these settings:
8. Selections – Select None. Choose your magic wand again and this time click on the outmost border of your image. Flood fill again with your gold gradient.
9. Keep selection – Effects – Distortion Effects – Pixelate with these settings:
10. Effects – Edge Effects – Enhance More. Selections – Select None.
11. Image – Canvas size – Width 650 and Height 500 – Background color white. Apply.
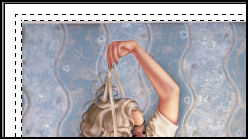
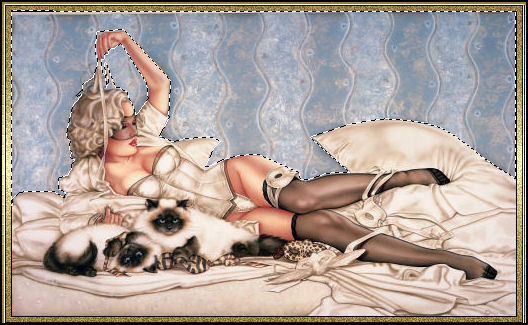
12. Choose your selection freehand tool – setting point-to-point – mode (add/shift) – feather 0 – anti-alias checked. Carefully trace out the background of the image. Once done with the main background, make sure you hold down your shift key and trace the area inside her raised arm, so we don’t miss any spot. Once done, you should have something like this:
13. Selections – Promote Selections to Layer. Duplicate this layer twice for a total of three. Rename them – wall 1, wall 2, wall 3 respectively. Selections – Select None.
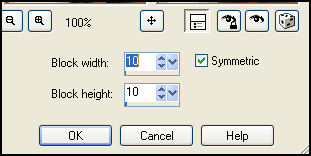
14. Close out wall 2 and 3 (by clicking on the eye) and make Wall 1 layer. Choose your mesh wrap tool with these settings:

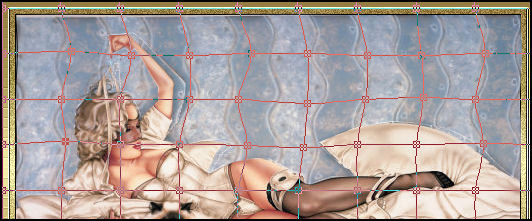
15. Placing your cursor on the ‘dots’, move the lines towards the right as carefully as possible – try to match the waves of the background. It should look a little something like this when done:
16. Once done, make close out Wall 1 and make Wall 2 active. This time around, move your dots towards the left – again as carefully as possible.
17. Once done, close out Wall 2 and make Wall 3 active. Move left and right this time – in whatever order you like.
18. Choose your text tool – WindDings 2 (this should be a part of your program) – switch your background color to the gold gradient used earlier - small caps D – size 72 – Vector – Stroke width 0 – type out the wind ding and position at the top left corner of your tag. This should be on your topmost layer.
19. Duplicate and Image - mirror. Merge these two layers together. Duplicate and Image – Flip. Merge these two layers together. Apply light drop shadow – 2,2,50,5.
20. Duplicate your ‘corner’ layer twice for a total of three layers. Rename Corners 1, Corners 2, Corners 3.
21. Make Corner 1 active – Adjust – Add/Remove Noise – Add Noise – same settings as we used above, only set the value to 20. Make Corner 2 active – repeat effects, changing value to 25. Repeat process for Corner 3 – setting value to 30.
22. Copy and paste word art provided as new layer and position as you see on my tag.
23. On new layer, add your copyright and license info and your name with text style of your choice.
ANIMATION TIME:
24. Make your background layer active. Close out Walls 2 and 3, Corners 2 and 3. Copy merged and paste as new animation in Animation Shop.
25. Back to PSP. Close out Wall 1 and Corner 1 and open up Wall 2 and Corner 2. Copy merged and paste after current frame in Animation Shop.
26. Back to PSP. Close out Wall 2 and Corner 2 and open up Wall 3 and Corner 3. Copy merged and paste after current frame in Animation Shop.
27. Edit – Select All – Animation – Animation Properties – Opaque – White. Animation – Frame Properties – 20.
28. View – Animation and you’re all set! I hope you enjoyed the tutorial.
Please no hotlinking the images! Neither can you use the tags created for your personal use or on blogs or websites without written permission. This tutorial is registered with TWI.
© KiyaSama - all rights preserved. Tutorial Written 12th June, 2009.
Tutorials Home
|
|