
ARROGANCE
SUPPLIES NEEDED:
A tube of choice – I’m using one from BaraChan. You must purchase or have a MPT license to use them. You’re also welcome to use a tube of your choice.
Lovely FTU Scrap kit – Arrogance – by Lacarolita's Designz. You can download it from her blog HERE
Plug-ins - Filters Unlimited 2.0 - DEMO can be downloaded HERE
Mask by Weescotslass
Word Art by Me / Doodle - SUPPLIES
Fonts of choice or – Pixelette and Bikers Bones
Jasc Animation Shop 3
REMEMBER TO SAVE OFTEN!
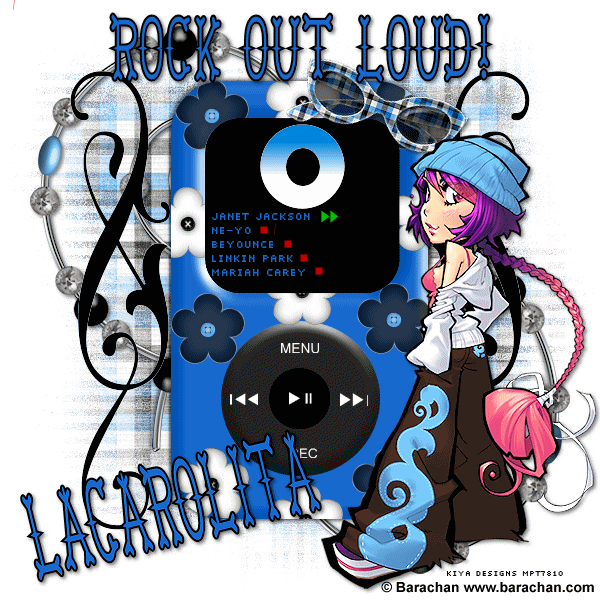
1. Open transparent image – 600 x 600 – flood fill with white.
2. From scrap kit, select Ipod 1. Copy and paste as new layer on your image. No need to resize.
3. Our Ipod needs a little sprucing up, don’t you think? Time to make it a little more fun! Go to Selections – Select All – Float. You should now have marching ants around your Ipod image.
4. From scrap kit, choose Flower #5. Copy and paste as new layer on your image. Images – Resize to 10%. Position this flower anywhere you like on your Ipod (on the main body that is). Duplicate this layer several times (at least four times) and move all over the Ipod. Don’t worry about the flower ‘sticking’ out from the edge of the Ipod. We are going to take of this in a bit.
5. Satisfied with your flower placements – Selections – Invert – and then go to each FLOWER LAYER and press delete. Selections – None.
6. Close out the white background and Ipod layer (click on the ‘eye’ to X them out). Make one of your flower layers active and go to Layers – Merge – Merge Visible.
7. Repeat steps 3 to 6, only this time we’re using Flower #6 from the kit.
8. Looks much prettier now, doesn’t it? Make your Ipod layer active. Now, using your magic wand, Mode (Add/Shift), Tolerance – 10. Click inside the square inside the Ipod. Selections – Modify – Expand by 5. Layers – New Raster Layer – Flood fill this layer with black. Move this black layer beneath the Ipod layer. De-select.
9. Apply drop shadow to your Ipod layer. Settings 2, 2, 50, 5. Repeat drop shadow only this time change vertical and horizontal to -2 (negative 2)
10. Using your dropper tool, select the blue color from your Ipod – it will automatically change in your foreground color palette – click on the little arrow toggle to move it to the background color palette.
11. Activate your font – it has to be a tiny one and I’m using Pixelette- Vector – Stroke Width 0 – Size 6. Type out the name of the name of your favorite group and music as you can see below:
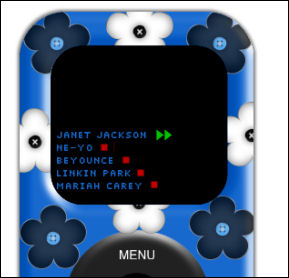
12. Remember that you have to start writing from the midpoint of the black layer! We want the top open for our animation.
13. When you’re done with the names – convert to raster.
14. Now set your background color to green - #00c000 - and foreground to null. Go to your presets and look for the triangle shape. Draw out a tiny triangle (might want to move this a bit higher on the black layer). Convert to raster. Image – Rotate – Free Rotate – 90 degrees. Position this as you see in my tag. Duplicate this layer and position as on tag. Merge down.
15. Set your background color to red - #c00000 – and this time choose your rectangle presets. Draw out a small square. Convert to raster and position as you see on my tag. Duplicate how many number of times (for the number of names you have) and position as you see on tag. Merge all square layers together.
16. Set your background to white – presets – eclipse – draw out a small circle above your list of names. Convert to raster.
17. Go to your selections tool and pick the circle option – Feather 0 – anti-alias checked. Carefully select a circle in the middle of the white one – don’t make it too large! – once satisfied – Edit – Cut. You should now have a nice ‘doughnut’. De-select.
18. Duplicate this layer twice for a total of three layers – rename circle 1, circle 2, and circle 3.
19. Close out Circles 2 and 3. Make Circle 1 active. Selections – Select All – Float.
20. Effects – Plug ins – Filters Unlimited 2.0 – Color Filters – Blue Sky with these settings:
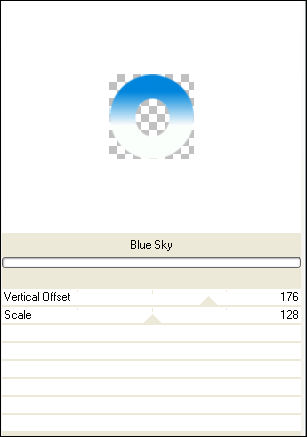
21. Keep selected and open up Circle 2. Make active. Effects – Plug-in – Color Filters – Blue Sky - Adjust Vertical Offset to 140 and Scale to 78.
22. Open and make Circle 3 active. Change Settings to 108 and 187 respectively. Selections – Select None.
23. Choose Paper #5 from the kit – resize by pixels to 600x600. Copy and paste as a new layer right above the white background.
24. Apply your mask of choice or the one provided. Open as new image on your workspace – Layers – New Mask Layer – From Image – choose the mask from the drop down menu and apply.
25. Make your topmost layer active. Open doodle and copy and paste as new layer on your tag. Move to the left of Ipod (see my tag for reference). Duplicate and Images – Mirror. Merge down these two layers. Move this doodle layer right above your mask layer. Duplicate doodle layer twice for a total of three layers. Rename Doodle 1, 2 and 3 respectively.
26. Close out Doodle layer 2 and 3. Make Doodle 1 active. Selections – Select All – Float – Defloat – Make your foreground color palette a blue from your Ipod and the background to black.
27. Effects – Plug-ins – Filters Unlimited – Pattern Generators – Audio Wave – with amplitude set to 188 – in other words default setting.
28. Make Doodle layer 2 active – move amplitude settings to 83. Make Doodle layer 3 active – move amplitude settings to 109. Selections – Select None.
29. Now add whatever extra elements you’d like. You’re welcome to choose what you see on my tag or add anything else you’d want, as long as you remember to resize them.
30. When done with your elements. Copy and paste your tube as a new layer. Resize if needed and add light drop shadow – same settings as used above.
31. On a new layer, add your copyright and license information.
32. Open word art provided and copy and paste as new layer on your tag.
33. Using a font of choice, write out your name. I’m using the same font I used for the word art – Biker Bones – Vector - Stroke Width 2.0 – Foreground on Black, Background on blue from Ipod.
34. All done? Great! Time for Animation!
ANIMATION TIME!
35. Make your white background layer active. Close out the following layers: Circle 2, Circle 3, Doodle 2, and Doodle 3. Right click on your tag – Copy Merged.
36. Open Animation Shop and paste as new animation.
37. Back to PSP. Close out Circle 1 and Doodle 1. Open up Circle 2 and Doodle 2. Copy Merged and paste after current frame in AS.
38. Back to PSP. Close out Circle 2 and Doodle 2. Open Circle 3 and Doodle 3. Copy merged and paste after current frame in AS.
39. In Animation Shop, you should have three frames. Select all – View – Animation and you’re all set!
40. Hope the tag was fun to create and don’t forget to email any questions you might have to me. Thanks!
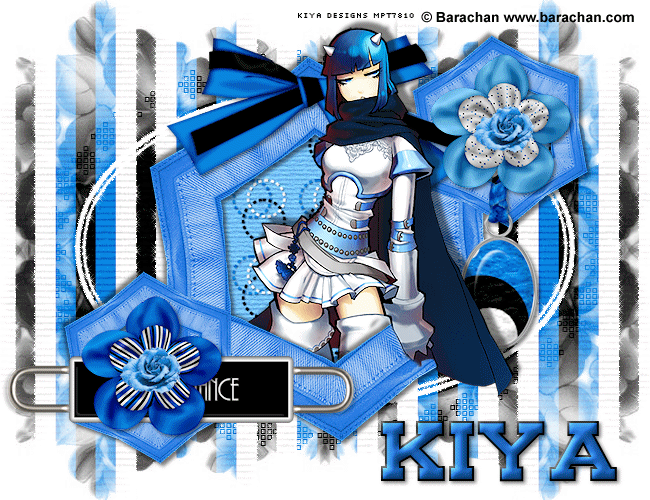
Below is another tag using the same kit - have fun with it! ^_^
Please no hotlinking the images! Neither can you use the tags created for your personal use or on blogs or websites without written permission. This tutorial is registered with TWI.
© KiyaSama - all rights preserved. Tutorial Written 30th May, 2009.
Tutorials Home
|
|