
ARALE IN DREAMLAND!
SUPPLIES NEEDED:
Corel Paint Shop Pro 8+
Tube included in supplies (or you can use one of your choice as long as it will work with this kind of tut) – I do not know the artist for this particular picture, but I do believe it’s based off the anime character ‘Arale’ from Dr. Slump by its original creator Akira Toriyama. If anyone knows who the artist is, please let me know and credit will be given.
Template #25 by Babe's Designz
Scrap Kit – Welcome to Dreamland Collab Kit by - Redju and Thaliris [Unfortunately, I hear this kit is no longer FTU or available] – However, you can use a scrap kit of your choice.
Eye Candy 4000 – Motion Trail and Eye Candy 3.1 – Motion Trail - Download demo HERE
Font – Almost Paradise
Jasc Animation Shop 3
Download SUPPLIES
REMEMBER TO SAVE OFTEN!
1. Unzip supplies and open up tube and template. Minimize tube for now. We won’t need it for some time. Make template active and delete the topmost layer (with the copyright info).
2. From the scrap kit, choose Paper 12. Make the half-moon layer active. Selections – Float – Defloat. Selections – Modify – Feather by 5.
3. Copy Thaliris Paper 12 and paste as new layer on your template. Selections – Invert – Delete. De-select.
4. Delete original black half-moon template.
5. Choose Redju Paper 06 from scrap kit. Image – Resize by pixels – 400 x 400 (all layers checked). Copy and paste as new layer above your new yellow moon layer. Position paper in such a way that you can see the house in the middle of the moon. Once satisfied, invert and delete. De-select.
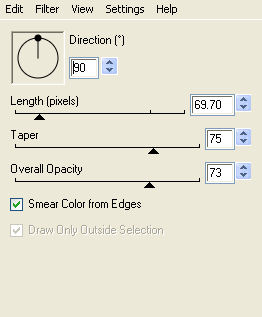
6. With your ‘house’ layer active, using your freehand selection tool on these settings:

7. Select top part of the layer like so:
8. Press delete at least twice. Repeat the process for the bottom half of the layer.
9. Layers – Merge - Merge down – this merges the house and yellow moon layers together.
10. Pick Thaliris Paper 06 from kit. Make your stars layer active. Selections – Float – Defloat – Modify – Feather by 3.
11. Copy and paste paper as new layer. Selections – Invert. De-select. Delete original stars layer.
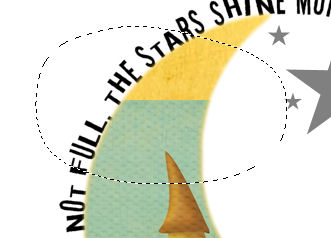
12. Make the word art layer active. Selections – Float – Defloat. Add new raster layer and floodfill with gradient color of choice. I’m using a bright pinkish hue for mine.
13. De-select and delete original word art layer.
14. Choose Cloud 06. Copy and paste as new layer above the white background and resize by 80%. Position a bit higher at the top of your tag.
15. Open the three fun looking trees and paste as new layers at the very top of your tag. Resize by 30 or 40% and position as you see on my tag. When done, merge all the tree layers together.
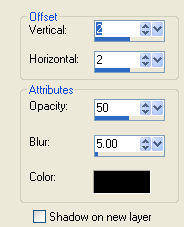
16. Open the hot air balloon and resize by 30%. Paste as new layer and position as you see on my tag. You’re welcome to add drop shadows to these layers. These are the settings I’m using:
17. Open the boy and girl elements. Resize by 20% and position as you see on tag. Remember to sharpen and add drop shadow.
18. Open the three ‘swirl’ elements. Resize by 40%. Place these swirl layers right above the moon layer. Position as you see on tag. Merge these layers together and add drop shadow.
19. Open up ‘legs’. Paste as new layer and resize by 10%. Move this behind the tree layer so it would look as if it’s sticking out from the tree. Drop shadow.
20. You can add other little elements here and there if you’d like – have fun with it!
21. When done with your elements, select Thaliris Paper 11. Copy and paste as new layer above the white background. Apply the mask provided or one of your choice. Delete and copy merged and then resize by 80%.
22. Now add your copyright or tag license information on a new layer.
23. Selecting your font tool use the following settings and write out your name and position as you see on tag.

AND NOW FOR THE FUN(NER) PART!
24. Select ‘water’ from the elements – paste as new layer on your tag – resize by 50% and move to the left most part of your tag (see mine for reference) – add drop shadow.
25. Make your tube active. Copy and paste as new layer and resize by 40%. Position this tube right above the water, so it will look as if she’s sitting on it. Drop shadow. Rename this layer as ‘Girl 1’.
26. Duplicate ‘Girl 1’ and move copy to the top of your tag – make sure it’s in a direct line to the bottom girl 1 layer.
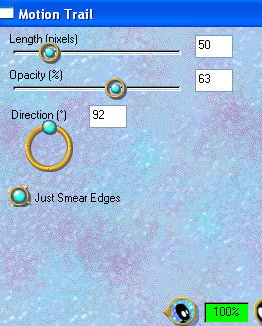
27. Effects – Plug ins – Eye Candy 4000 – Motion Trail – Settings – Swoop – with these dimensions:
Rename this layer as ‘Girl 2’.
28. Back to ‘Girl 1’ and duplicate again. Position this tube above ‘Girl 2’. This time we are going to use Eye Candy 3.1 Motion Trail on these settings:
29. Rename as ‘Girl 3’. Duplicate this layer. Again, position directly below ‘Girl 3’ and rename as ‘Girl 4’.
30. Go back to your original tube layer – Girl I – merge down with the water layer. Rename as Girl 1 again.
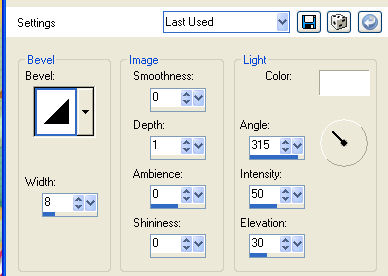
31. Close out all your girl layers. New raster layer. Selections – Select All – Modify –Contract by 8 – flood fill with pattern or color of choice. Apply Inner Bevel with these settings:
32. De-select and apply drop shadow.
33. All done? Great! Time to get to animating.
ANIMATION TIME!
34. Close out the frame layer. Open up ‘Girl 2’ layer. Make your white background layer active. Right click on your tag and choose ‘copy merged’.
35. Go to Animation Shop (AS) and paste as new animation.
36. Back to PSP. Close out ‘Girl 2’ and open up ‘Girl 3’. Copy merged and back to AS, Edit - paste after current frame.
37. Back to PSP. Close out ‘Girl 3’ and open up ‘Girl 4’. Copy merged and back to AS, Edit – paste after current frame.
38. Back to PSP. Close out ‘Girl 4’ and open up ‘Girl 1’. Copy merged and back to AS. Edit – paste after current frame.
39. You should now have a total of 4 frames in Animation Shop.
40. Back to PSP. Close out all the layers and open up the frame at the very top. Copy and paste as new animation in AS.
41. Ctrl + L and duplicate this three times for a total of 4 frames.
42. Make sure you’re in frame #1 for the frames. Edit – Select All – and making sure your girl/tag animation is all selected as well – drag the ‘FRAMES’ to frame #1 of your tag. Position properly.
43. Edit – Select all – Animation – Frame Properties – set to 25. Select the last frame and adjust frame properties to 200.
44. View – animation. Pretty cool, eh?
45. Save as .gif image and you’re all set. Hope you liked the tutorial! ^_^
Please no hotlinking the images! Neither can you use the tags created for your personal use or on blogs or websites without written permission. Tutorial has been registered under TW1.
© KiyaSama - all rights preserved. Tutorial Written 21st May, 2009.
Tutorials Home
|
|