
PARTY CENTRAL

This tutorial is rather animation-heavy, but I liked the way it turned out, so hope you enjoy it as well.
SUPPLIES NEEDED:
Tube of choice – I’m using a vector image copyright Jet Drawing.
You’re also welcome to use any other tube of your choice.
Mask – HERE
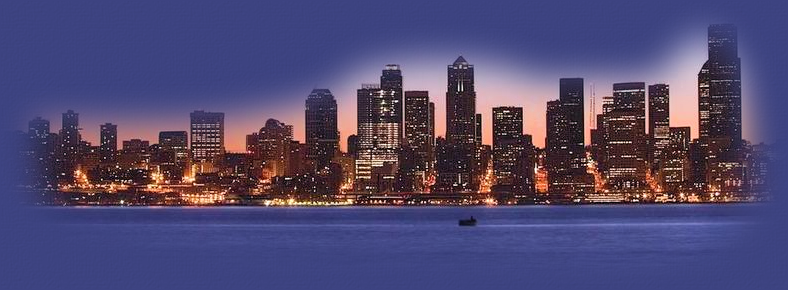
City skyline image – HERE
Plugins – Xero Fritillary - DOWNLOAD HERE
Plugins – VM Natural – Sparkles - DOWNLOAD HERE
Plugins – Xenofex 2 – Constellation - DOWNLOAD HERE
Font of Choice
Animation Shop 3
1. Open transparent image 675 x 500 - Floodfill white and merge down to form background image.
2. Layers, New Raster layer, choose light (not too light though) color from your tube, floodfill layer with the color.
3. Effects, Xero Fritillary on current settings, click OK.
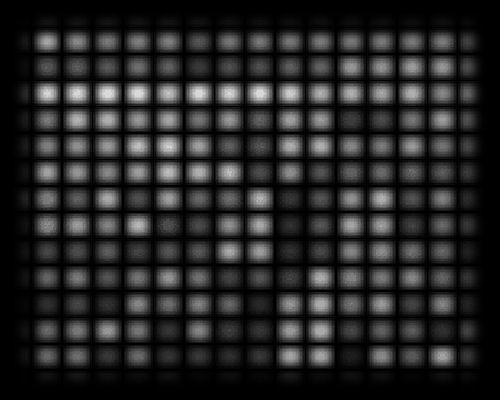
4. Open your mask, layers, new mask layer, from image – select mask from drop down menu (invert mask data and source luminance checked), delete and ungroup layers.
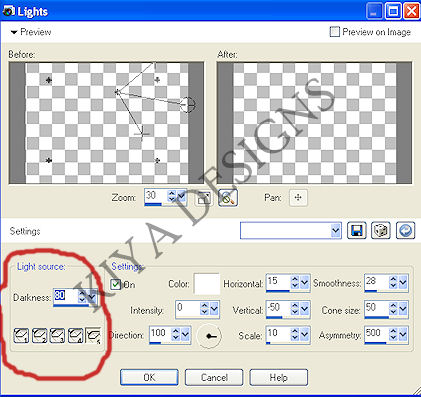
5. Duplicate this layer 3 times – meaning you’ll have 4 layers of the masked background. Close out original layer, go to the first copy, effects, illumination effects, lights, under light source (circled section below) make sure #5 is highlighted, and your color box is set to white. Click OK.
6. Close out this layer and go to the next copy, back to effects, illumination effects, lights and set the light source to #2. Click OK. Close out this layer and go to the final copy. Set light source to #1.
7. So far, so good? Great! Now it’s time to add our city skyline image. Copy and paste as new layer (above the masked layers) – resize if needed. Double click on layer to get to layer properties – blend mode, luminance legacy, opacity 43. Apply.
8. Copy and paste your new tube as a new layer, move towards right side of the tag. Apply light drop shadow, 1,1, 50, 5. Duplicate tube layer twice (for a total of three layers). Close out top two layers, on original, go to VM Natural – Sparkles and apply existing settings. Close out this layer, go to the next copy, move random seed higher or lower, depends on how large you want your sparkles. Once satisfied, close out layer and go to third copy, again, move the random seed and click OK.
9. Add new raster layer – this should be at the very top of all your other layers – select all, modify, contract by 6, selections invert, using the light color from your tube, floodfill. Apply drop shadow 3,3, 50, 5. Apply dropshadow again, this time changing it to -3, -3, 50, 5.
10. On new layer, add word phrase of choice – mine is ‘Party City’ – Font used was FontLogic – foreground black and background same light color from tube – stroke width 2.0. Apply light drop shadow of choice and duplicate this layer twice (for a total of three).
11. Close out top two layers, on original, go to Xenofex 2 and choose constellation with these settings:
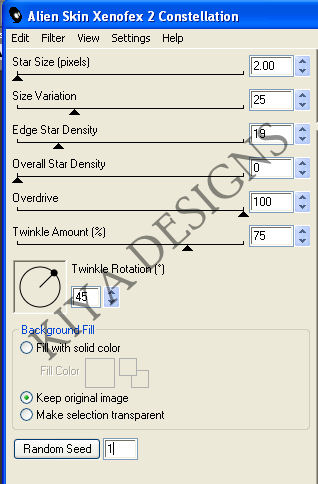
12. By now you should figure out how it works, so apply the effects to the next two layers, making sure you press the random seed button twice.
13. Add your name, copyright and license info on new layer. All done? Awesome! Now it’s time for the hard work *lol*
ANIMATION TIME!
14. You should have three main areas to animate: masked layers/lights, tube, tag phrase.
15. Close out top two layers of each of these duplicated areas, so you should have the originals open. Copy merged and paste as new animation in Animation Shop.
16. Back to PSP, close out original layers, and open the next copies of each of the duplicated areas. Copy merged and paste after current frame. Repeat this process for the third copied layers in PSP.
17. You should now have 3 frames in AS. Edit, select all, view, view animation, and viola! You have your tag all ready.
Below is another version of the same tag above. Hope you enjoyed the tutorial. I’d love to see your results, so please don’t hesitate to send me an email.
Email to: kiyasama@yahoo.com

Please no hotlinking the images! Neither can you use the tags created for your personal use or on blogs or websites without written permission. Tutorial has been registered under TW1.
© KiyaSama - all rights preserved. Tutorial Written 23rd March, 2009.
Tutorials Home
|
|