
THE MISFITS II
SUPPLIES NEEDED:
2 Tubes of Choice – I’m using fabulous ones from Elias Chatzoudis. You must purchase or have an ELIAS license to use them. You’re also welcome to use other tubes of choice.
Awesome new FTU scrap kit from Seachell called ‘Rock Me’ – you can download it from her blog – HERE
Mask from Weescotslass - HERE
Plug ins – MuRa Meister’s Copies – HERE
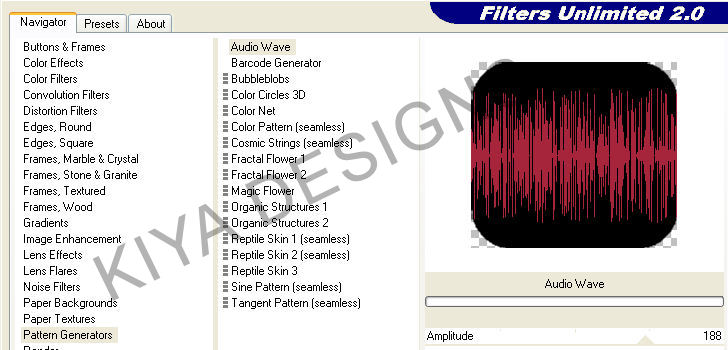
Plug ins – Filters Unlimited 2.0 Pattern Generators (Audio Wave) - HERE
Fonts of Choice or the font Base02
1. Open transparent image – 675 x 600 – Floodfill white and merge down to form new bkg.
2. Choose Element 34 from scrap kit. Paste and copy as new layer on image. Resize to 30%.
3. Apply MuRa Meister copies on these settings to create a ‘note’ frame:
4. Magic wand. Click inside note frame, expand by 2.
5. Choose Paper 5. Paste as new layer. Selections, invert, delete. Move paper layer beneath frame.
6. Select note frame again. Expand. Paste first tube (resize if needed). Selections, invert, delete. Move tube layer beneath frame. Add light drop shadow to frame.
7. Choose Element 25. Resize by 50%. Paste above note frame. Rotate right by 10 degrees. Sharpen and position properly.
8. Choose Paper 1. Paste as new layer above white background. Apply mask, delete, ungroup and resize by 80% (if needed).
9. Choose Element 9. Paste as new layer above paper 1 layer. Apply mask, resize by 80%. Merge down with paper 1 layer.
10. Now it’s time to play around with your elements. I used #38 and #37. Moved them below the note frame layer and to the right of the tag – resized by 50%. See my tag for reference.
11. Paste your 2nd tube as a new layer and position on left side of tag – apply light drop shadow of choice.
12. I also used Element 14 – resized by 60% - rotate right by 10 degrees.
13. Once satisfied with elements used, choose Element 15 (the iPod) – resize by 50%. Move beneath note frame and position on right side of tag. Rotate right by 10 degrees. Add light dropshadow, duplicate and mirror. Merge down.
14. Magic wand, select inside the squares of the iPod. Expand by 6. Create new layer, floodfill with black. Duplicate this layer twice for a total of 3 black square layers. DO NOT DE-SELECT YET!
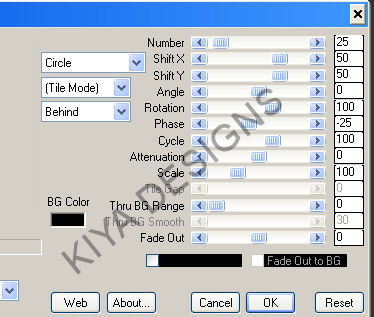
15. Choose a light color from your tube and make that your foreground color, leave background as black. Making sure the top two duplicated layers are closed and you’re on the original black layer, go to Filters Unlimited, Pattern Generators, Audio Wave on these settings:
16. Apply. Close out the layer, move to the next, open and move slider to 156. Repeat the process for the last layer, moving slider to 161. De-select.
17. Add your name, copyright and license info.
ANIMATION TIME!
18. Close out top two layers of audio wave. Copy merged and paste as new animation in AS3.
19. Repeat this process for the next two layers (you know the drill by now *lol*) and when done, you should have three frames in AS.
20. Select all, frame properties set to 20. View animation and enjoy the prettiness!
Below is another version of the same tag above. It's non-animated! And to see the tutorial, click on the image:

Please no hotlinking the images! Neither can you use the tags created for your personal use or on blogs or websites without written permission. Tutorial has been registered under TW1.
© KiyaSama - all rights preserved. Tutorial Written 3rd April, 2009.
Tutorials Home
|
|