
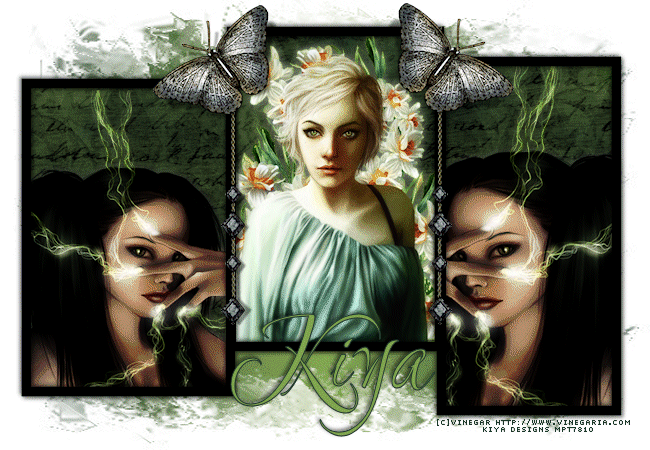
GREEN LIGHT
SUPPLIES NEEDED:
[You Must Have Working Knowledge of PSP!]
Paint Shop Pro Vers. 9+
Animation Shop 3
Your tube of choice. Tube(s) used for this particular tutorial is by Vinegar. You must have an CDO license to use it.
Plug ins – Mura Meisters – Clouds, Eye Candy 3.1 – Glow, Xenofex 1.1 - Lightning (Go to Liberta Designs to search for appropriate filters)
Mask of choice
Fonts of Choice or P22 Ruthie
SUPPLIES HERE
REMEMBER TO SAVE OFTEN!
1. Open up new image (white background) 650 x 450.
2. Open template from supplies. Paste as new layer.
3. Magic wand – click inside each rectangle – Selections – Modify – Expand by 5.
4. Pick two colors from your tube (one dark and one light) in my case I used the colors #20372d and #82a44f.
5. Go to gradients palette – foreground/background – Angle (90), Repeats (1).
6. On your canvas, add new raster layer. Flood fill with gradient. Selections – Invert – Delete. Move floodfill layer beneath frame template.
7. Keep selected and make floodfill layer active. Go to Effects – Mura Meister – Clouds – Default Setting. Click okay. Deselect.
8. Make template layer active. Magic wand – click on middle rectangle – expand by 5. Copy and paste tube – resize if needed – Selections – Invert – Delete. Move tube beneath frame layer.
9. Duplicate tube – on top layer – adjust – blur - Gaussian blur (5). Double click on layer – blend mode – soft light. Merge down.
10. Click on left rectangle – repeat steps 8 and 9.
11. Do the same for the right rectangle – repeat same steps as above.
12. Merge both girls in left and right rectangles together. Add drop shadow of choice.
13. Make floodfill layer active. Selections – Select All – Float – Defloat – Open up Texture. Copy and paste as new layer. Selections – Invert- Delete.
14. Double click on layer, Blend – Overlay. Merge down with floodfill layer.
15. Now it’s time to add whatever embellishments you want or you can use the ones in the supplies. Resize and arrange them as seen in tag.
16. Add drop shadow of choice to your embellishments (supplies are already shadowed) and then drop shadow on black ‘frame’.
17. Make background layer active. New raster layer, floodfill with your gradient (from above). Apply mask of choice (optional!).
18. If you’re not using tubes with the lightning streaks on the girl’s fingers, then you are basically through with this tutorial, if not, let’s move on!
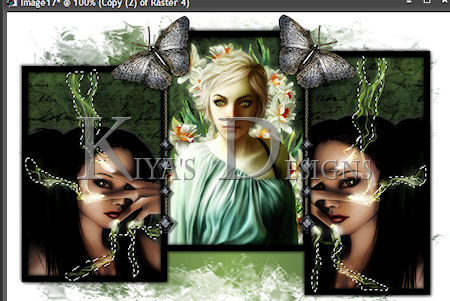
19. Make girl with lightning fingers layer active. Freehand selection tool – Freehand, Add(Shift), Feather (0)
20. Now, carefully outline the lightning around girl’s fingers. Remember to hold down the shift key when you want to move from one to the next. When done, it should have ants around them like so:
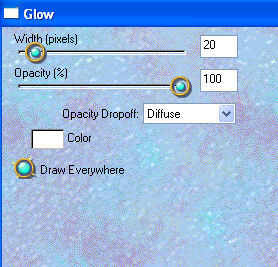
21. Duplicate this layer twice for a total of 3 layers. Close out top two and make original layer active. Effects – Eye Candy 3.1 – Glow – with these settings.
22. Repeat this step for the next two layers, moving the opacity slider higher or lower for each one. When done, select none.
23. Now using your freehand selection tool, draw around lightning streaks like so
24. Make original layer active. Effects – Xenofex 1.1 – Lightning - with these settings:
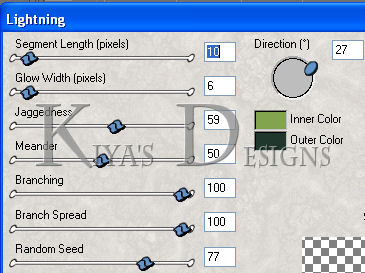
Note colors in box – they must match light and dark colors chosen from tube.
25. Repeat effects for the next two layers, making sure you shift the ‘random’ tab for each.
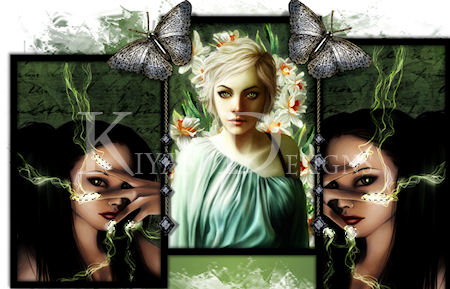
26. All done? Great! Now add your license info and text of choice. And now we head to AS!
ANIMATION TIME:
1. Open up animation shop.
2. Back in PSP, making sure your top two copies of the ‘lightning’ layers are invisible and only original is active, right click, copy merged.
3. Go back to AS, right click and paste as new animation.
4. Back in PSP - close out original, open up Copy 1.
5. Go back to AS – Edit – Paste After Current Frame.
6. Go back to PSP, close out Copy 1, and open up Copy 2.
7. Go back to AS – Edit – Paste After Current Frame.
8. Edit – Select All. Animation – Frame Properties – set to 30
9. View – View Animation. If satisfied File – Save As and you’re all set!

Please no hotlinking the images! Neither can you use the tags created for your personal use or on blogs or websites without written permission. This tutorial is registered with TWI.
© KiyaSama - all rights preserved. Tutorial Written 17th September, 2010.
Tutorials Home
|
|