
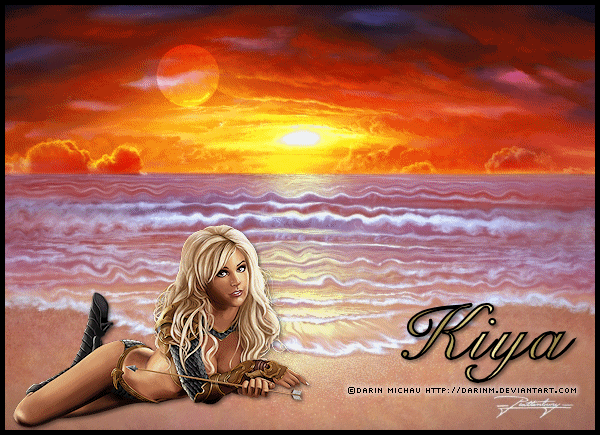
GOLD BEACH
[BLEND AND WRAP TOOL TUTORIAL]
SUPPLIES NEEDED
Corel Paint Shop Pro 8 and up
Tube of Choice – I’m using one from Darin Michau – http://darinm.deviantart.com
Two images supplied HERE
[Or you’re welcome to use yours as long as they will work well together for this tutorial]
Font – Cygnet Round
Jasc Animation Shop 3
REMEMBER TO SAVE OFTEN!
This tutorial is simple, but it’s going to show you how to make use of the Wrap Tool as well as doing a simple blend.
1. Unzip supplies and open the two images provided. Shift + D to duplicate each and delete originals.
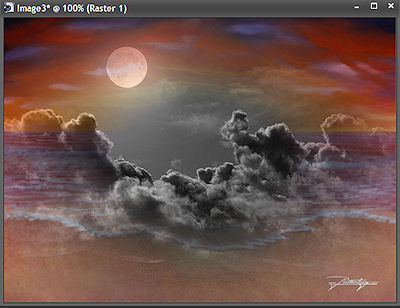
2. As you’ll notice, ‘Clouds’ is a tube meaning it’s on two separate layers. We only need the actual cloud layer and not the black background. Make the cloud layer active, right click and copy.
3. Make the ‘Ocean_Dream’ image active. Paste your ‘cloud’ layer on top of this. You should now have something like this:
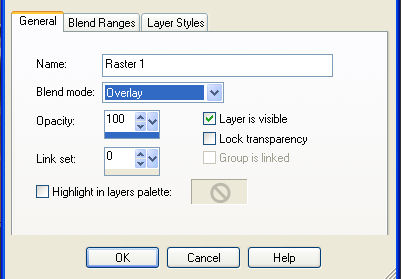
4. On your layers palette, double click the clouds layer to bring up the dialogue box. In Blend Mode, select the ‘Overlay’ option:
5. Now choose your ‘eraser ‘ tool with these settings:

6. And making sure you’re still on the cloud layer, begin to erase from the horizon down to the shoreline. Do not erase any part of the sky! But if you do make a mistake, remember you can also go to the Edit – Undo Command.
7. All done? Fabulous! Now it’s time to create the waves using the Wrap Tool.
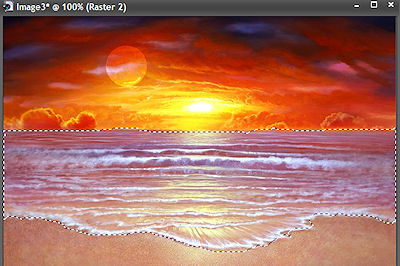
8. Make your Ocean_Dream layer active (Background). Right click on this layer and click on ‘Promote Background to Layer’. It will automatically be renamed as ‘Raster 2’.
9. With your selection tool set to Freehand, Mode (Add) and feather 0 (you can choose point-to-point if that works best for you), draw around the sea until you get marching ants like so:
10. Right click on this layer – still keeping area selected! – and duplicate this twice for a total of 3 layers.
11. Close out the top two layers and make your original Raster 2 layer active. Locate your Wrap Tool and using these settings [For PSP 8 and lower, we’re picking the ‘Left Twirl’ option]:

Begin to brush small circles – try to match the movement of the waves as much as possible – no bold or wide strokes or you’ll ruin the effect we’re hoping to create. When done, click the apply button (green check mark).
12. Close out this layer, and make the next copy active. Repeat the brush strokes, only this time, select the ‘Right Twirl’ option. Again, try to make your strokes match the pattern of the waves as much as possible.
13. When done, close out this layer and pick the last copy. Change to ‘Left Twirl’ again and repeat the brush strokes.
14. When done and happy with your results, go to Selections – Select None – to deselect.
15. Copy and paste your tube as a new layer (above the cloud layer) and resize just enough that it seems like she/he is a part of the beach scenery.
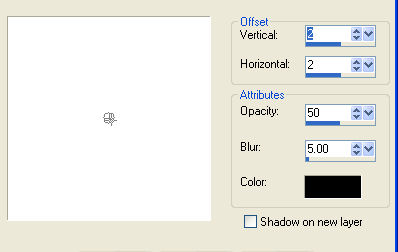
16. Add a light drop shadow with these settings:
17. On a new layer, add your copyright/license information.
18. Add your text/name – I’m using the font ‘Cygnet Round’ – Vector – Foreground Black and Background on Gradient Gold – Stroke Width 2.0. Right click on this layer and convert to raster. Apply same drop shadow as earlier.
19. You can choose to add a simple border to this. Make sure you’re on the topmost layer. Selections – Select All – Modify – Contract by 5 – Selections – Invert. Add new raster layer. Floodfill with color of choice – I’m using black in this case – nothing too fancy. Once done, Selections – Select None.
ANIMATION TIME!
1. Open up Animation Shop. Back in PSP, keep your text or ‘frame’ layer active, and making sure that the top two duplicate layers of ocean_dream are closed, right click on your image and copy merge. In AS, paste as ‘New Animation.’
2. Back to PSP. Close out Raster 2 and open ‘Copy of Raster 2’ – again, copy merged and go back to AS. Only this time go to ‘Edit – Paste – After Current Frame’.
3. Back to PSP. Close out Copy of Raster 2 and open the last duplicate frame – copy merge and go back to AS. Edit – Paste – After Current Frame.
4. You should now have three frames in Animation Shop. Edit – Select All.
5. Animation – Frame Properties and set the number to 25.
6. View – Animation and check out the finished product! ^ _ ^
7. I hope you found the tutorial helpful and thanks for giving it a try.
Please no hotlinking the images! Neither can you use the tags created for your personal use or on blogs or websites without written permission. This tutorial is registered with TWI.
© KiyaSama - all rights preserved. Tutorial Written 24th May, 2009.
Tutorials Home
|
|