
LIT BY GARVEY

SUPPLIES NEEDED:
[You Must Have Working Knowledge of PSP!]
Paint Shop Pro Vers. 9+
Animation Shop 3
Your tube of choice. Tube(s) used for this particular tutorial is by Keith Garvey. You must have an GARVEY TUBES license to use it.
Mask of choice or one provided by Weescotslass
Fonts of Choice or Rockwell Bold Extra and PetraScriptEF-Alternate
SUPPLIES
REMEMBER TO SAVE OFTEN!
1. Open new image – white background – 650x500.
2. New raster layer – floodfill with black.
3. Open mask provided (or mask of choice). Making sure black layer is active – Layers – New Mask Layer – From Image – choose mask from drop down menu – source luminance checked – invert mask data UNCHECKED. Apply.
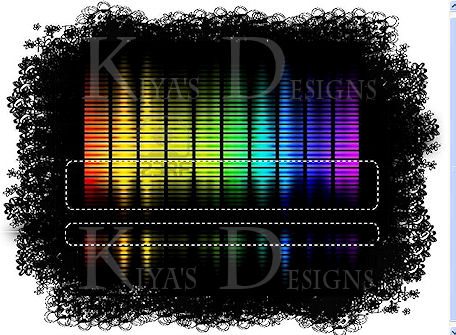
4. Open up ‘soundwaves’ image. Copy and paste as new layer. [It should be smack dab in the middle of the mask layer, if not arrange it so it looks that way.] Rename this layer ‘SOUNDWAVES’.
5. Duplicate ‘soundwaves’ layer and close out the original (click on eye next to it to do so). [This just so in case of an ‘error’ we can have backup, so to speak]
6. Make duplicate soundwaves layer active. Selection tool – rectangle with these settings:

7. Draw out rectangles at the bottom of the soundwaves and in the reflection like so:
8. Selections – Promote Selection to Layer – Selections – Select None.
9. Duplicate this promoted selection layer. On duplicate – Adjust – Blur – Gaussian Blur (8) – Double click on duplicate layer – change blend mode to Overlay. Merge both promoted layers together.
10. Repeat steps 7 – 9 only each time you move/select a little higher and lower respectively. By the time I was done I had about 4 promoted layers. It should look like this:
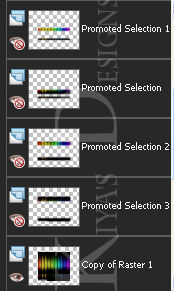
11. Now for every OTHER promoted selection layer, lower the opacity to 90. In other words, Promoted Selection Layer 1 will remain at 100, Promoted Selection Layer 2 will be lowered to 90, Promoted Selection Layer 3 remains at 100, Promoted Selection Layer 4 goes to 90. Make sense? Again this all depends on how many layers you ended up with. Just make sure every other one is less than 100.
12. Time to add our text. Choose the Rockwell Extra Bold – Foreground color White – Background Null. Size (120). Stroke Width (2). Type out the text ‘GARVEY’ or the name of the artist you’re using. Position in such a way that it takes up some of the colors of the waves. You can stretch or elongate this to fit.
13. Change to raster. Duplicate this text layer. On original – Adjust – Blur – Gaussian Blur (8) – or you can keep increasing it until you get that soft glow look to your liking. Merge both text layers together.
14. Copy and paste your tube as a new layer. Resize and position as you’d like. Duplicate this tube layer. On duplicate – Adjust – Blur – Gaussian Blur (4) – Double click on this layer – change blend mode to Soft Light. Merge both tube layers together.
15. Add your name (used the PetraScriptEF-Alternate). And then your license/copyright info. And if you don’t wish to animate, you’re all set!
ANIMATION TIME:
1. Open up your animation shop.
2. Back in PSP, close out top three promoted layers. Copy merged and post as new animation in Animation Shop.
3. Back to PSP. Close out PSL1, make PSL2 active. Copy merged. Post after current frame in Animation Shop.
4. Back to PSP. Close out PSL2, make PSL3 active. Copy merged. Post after current frame in Animation Shop.
5. Back to PSP. Close out PSL3, make PSL4 active. Copy merged. Post after current frame in Animation Shop.
6. When done, you should have four frames in Animation Shop. Go to View – Animation – and voila!
7. Hope you had fun with this one. Feel free to play around with it, and I’d love to see your results!
Please no hotlinking the images! Neither can you use the tags created for your personal use or on blogs or websites without written permission. This tutorial is registered with TWI.
© KiyaSama - all rights preserved. Tutorial Written 24th November, 2010.
Tutorials Home
|
|