
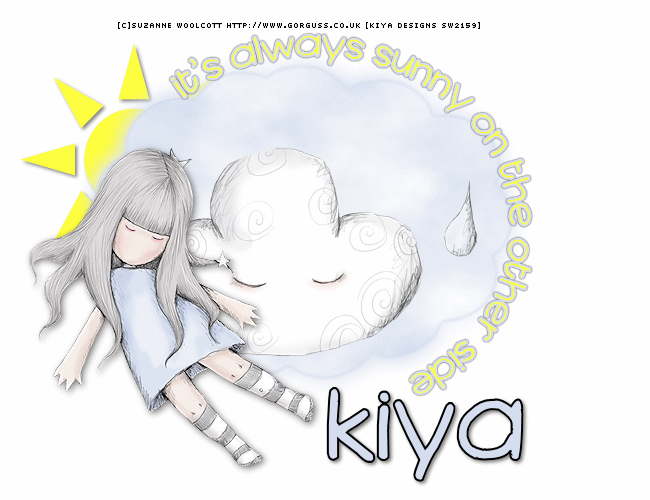
IN THE CLOUDS
SUPPLIES NEEDED:
A tube of choice – I’m using one from Suzanne Woolcott. You must purchase or have a license to use it.
Plug-ins - Mura Meister Clouds - DEMO can be downloaded HERE
Word Art by Me - HERE
Optional - Mask/Elements of choice
Font of choice or – FB Promenganate
Jasc Animation Shop 3
REMEMBER TO SAVE OFTEN!
1. Open image 650x500 – transparent unchecked – color white.
2. Go to your preset shapes and choose the ‘thought bubble’ shape. Line style –solid. Width – 2.0
3. Using your dropper tool, select a light color from your tube. Mine was #d5ddee.
4. Set background to null and draw out the shape – just large enough to cover the middle of your tag. Objects – Align – Center in Canvas. Convert to raster.
5. Choose your eraser tool and erase this portion of your thought bubble:
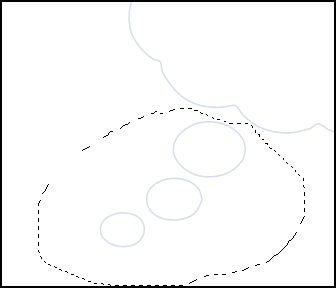
6. Use your magic wand and click inside the bubble. Selections – Modify – Expand by 1. New raster layer.
7. Effects – Plugins – Mura Meister Clouds – default settings and color settings – the colors should be the same as the one used for the cloud outline. Apply and move this layer beneath the outline layer. Merge these two layers together.
8. Choose your soften tool and with the settings below, soften the edge of the cloud about twice:

9. Duplicate the cloud layer – on the original – Adjust – Blur – Gaussian Blur – 10. Merge the two cloud layers together.
10. Set your background color to yellow - #ffff40 – foreground to null. Go to presets and choose a sun shape of choice.
11. Make your white background layer active and then draw out the sun shape and position as you see on my tag – behind the cloud. Convert to raster. Apply drop shadow with settings: 2, 2, 50, 5.
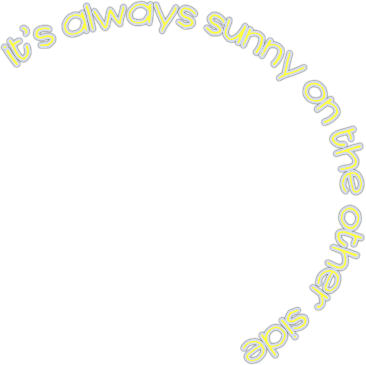
12. Copy and paste word art provided and position as you see on tag. You’re also welcome to write out a phrase of your choice, if mine doesn’t work for you.
13. Copy and paste your tube as a new layer. Resize if needed and Image – Mirror. Apply drop shadow of choice.
14. You can add other little elements here and there to spruce it up. I’m using a cloud image that came with the tube.
15. Choose your text tool and Vector, Stroke Width 2.0 – foreground color – black, background color – light color from your tube – font size – 72. Write out your name. Convert to raster.
16. On new layer (or same layer as above) write out your copyright and license info.
ANIMATION TIME!
1. Make your sun layer active. Copy and paste as new animation in AS.
2. Go to Effects – Insert Image Effect – Rotate (from the drop down menu) – Effect Length 2.0 – Frames per second – 5. Click on customize and make sure the Maximum angle is at 360 and canvas color is checked. Apply. You should have 11 frames in total.
3. Back to PSP. Make your white background active. Copy and paste as new animation in AS. Hold down your Ctrl key and press the L button until you have 11 frames in all. Edit – Select All.
4. Go to your sun animation and make sure all layers are selected as well. Be in the first frame of the sun animation and drag to the first frame of the white background. Position (in area as your main tag in PSP) and drop.
5. Back to PSP, close out sun and white background layer. Make any other open layer active. Copy merged and paste as new animation in AS.
6. Duplicate the frames as you did in #3 above for a total of 11 frames. Again, be in the first frame and drag to the first frame of your sun/white background animation.
7. Animation – Frame Properties – 20. View animation and you’re all set!
8. Below is another version of the same design. Hope you had fun with the tutorial!
Please no hotlinking the images! Neither can you use the tags created for your personal use or on blogs or websites without written permission. This tutorial is registered with TWI.
© KiyaSama - all rights preserved. Tutorial Written 30th May, 2009.
Tutorials Home
|
|