
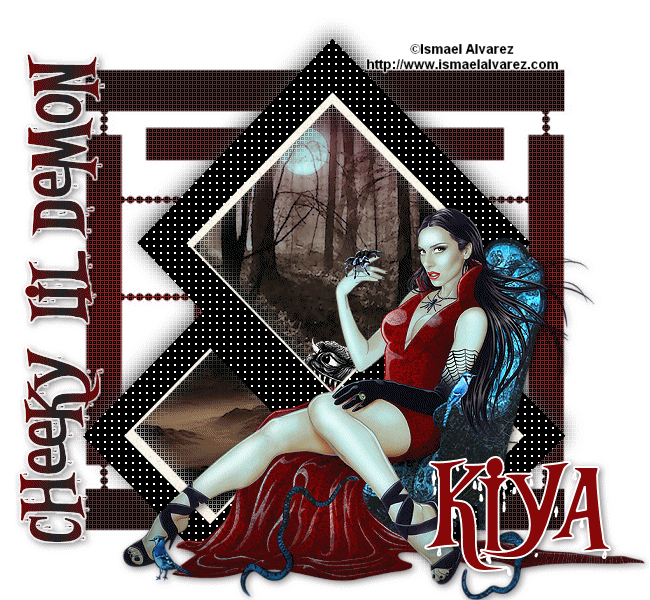
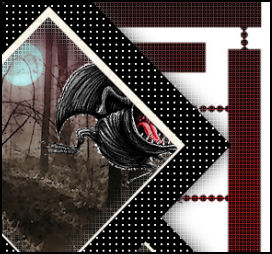
CHEEKY LIL' DEMON
SUPPLIES NEEDED:
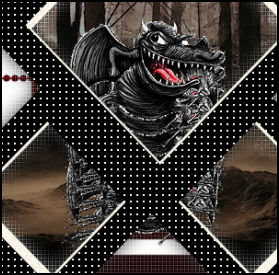
A tube of choice – I’m using one from Ismael Alvarez.
Plug-ins - Cybia Screenworks - Download HERE
Mask by Weescotslass
Word Art by Me / Template by Me - SUPPLIES
Fonts of choice or – Bleeding Freaks
Jasc Animation Shop 3
REMEMBER TO SAVE OFTEN!
1. Open new image 650x600 – transparent unchecked – color white.
2. Copy and paste template as new layer.
3. With magic wand, mode on add (shift), click inside the squares. Selections – Modify – Expand by 5.
4. New raster layer. Floodfill this layer with black. Move layer beneath the template layer.
5. Do not deselect yet! Make template layer active. Copy and paste dark image as new layer. Resize if necessary. Selections – Invert – Delete. Move this layer beneath the template layer. Selections - Select None.
6. Merge the black and dark image layers together. Make template layer active. Duplicate.
7. On the original template layer go to Adjust – Blur –Gaussian Blur – 10.
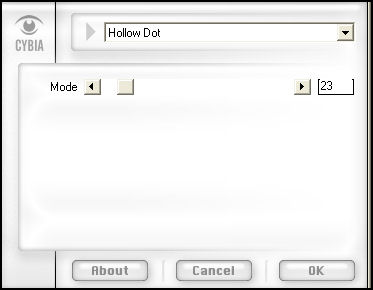
8. Effects - Plugins – Cybia Screenworks with these settings:
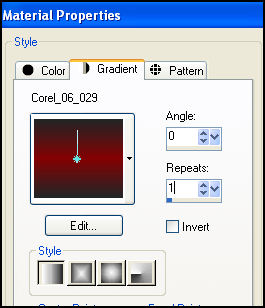
9. Choose a dark color from your tube and set as foreground color. Choose a lighter color from your tube and set as background color. Go to the gradients palette and choose foreground-background gradient on these settings:
10. Make your white background layer active. New raster layer. Floodfill this layer with your gradient.
11. Apply mask of choice or open mask provided. Layers – New Mask Layer – From Image – choose mask from drop down menu and apply. Delete and ungroup layers.
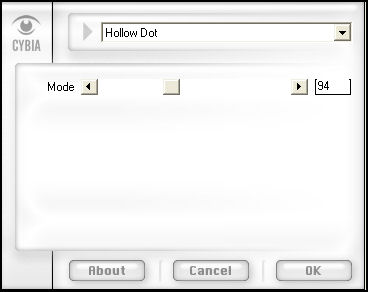
12. Effects – Plugins – Cybia Screenworks with these settings:
13. Make your topmost layer active. Copy and paste your tube as a new layer…just so we can position it in the right place. Apply light drop shadow of choice. Close your tube layer out.
14. Make your blurred template layer active. Copy and paste the demon tube provided as a new layer. Resize down by 70% twice. Sharpen. Rename this layer to Demon1 or just D1.
15. Position the tube like so:
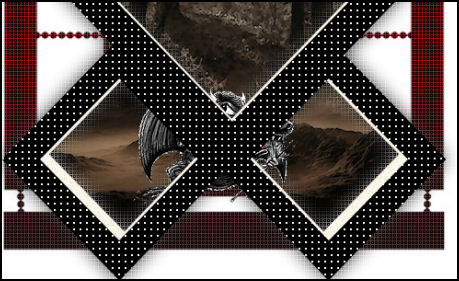
16. Duplicate D1 and move this layer a little above original tube like so:
17. Repeat this process three more times until you have something like this:
18. You should have a total of 5 demon layers when done. However, we want to give the illusion that the demon is coming out of the frame. So close out your top four layers and on the original, carefully erase any part of the demon sticking out from below the frame. Repeat this process for the other layers until there’s no need to erase anything anymore. Close out all five layers. We won’t need them for now.
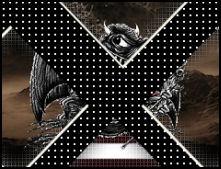
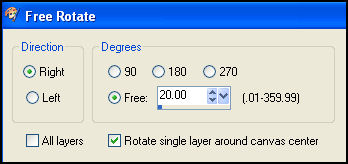
19. Make the D8 the active layer. Copy and paste the demon tube again. Resize as before and this time, image rotate with these settings:
20. Rename this layer DEMON2…or whatever else you’d like to name it to help you know what’s what. Position like so:
21. Duplicate this tube five times, moving upwards each time until you have something like this:

22. Again, we want to give the illusion that the demon is coming out from the frame…we don’t want to see the bottom half of it, so close out the top four layers and on the original DEMON 2, use your eraser tool to delete the bottom half, like so:
23. As you can see, only the head is sticking out. Repeat this process for the other layers.
24. When done, close out these layers and copy and paste the demon tube again as a new layer. Resize as we did above. Mirror.
25. This time, we are going to rotate to the left – same settings. Position and repeat from steps 21 to 23.
26. Make your topmost layer active. Add a phrase of your choice or you can copy and paste the word art provided.
27. On new layer or setting your text tool to vector, write out your name, copyright and license info.
28. Phew! And now we get to the fun part *lol*
ANIMATION CENTRAL!
1. We are going to be focused on our little demon tube, but before then, close out ALL layers except the WHITE BACKGROUND, MASK, DARK IMAGE BACKGROUND AND BLURRED TEMPLATE LAYERS. Copy merged and paste as new animation in AS.
2. Hold down your Ctrl key and press the L button four times so you have a total of five frames in AS.
3. Back to PSP. Close out all the layers previously opened and open up ONLY your FIRST SET OF FIVE DEMONS. Save this as DEMON1.pspimage on your desktop.
4. Close out these layers and open up the SECOND SET OF FIVE DEMONS. Save as DEMON2.pspimage on your desktop.
5. Repeat this for the THIRD SET OF DEMONS, so now you should have three demon .pspimages saved on your desktop.
6. Go back to AS. Open up all three demon images saved. They should all open up in their own frames – five each.
7. We’ll begin with the DEMON2 set. By now, if you’ve been following my tuts, you should be aware of the drag and drop method. But just in case you aren’t…Edit – select all frames for both DEMON2 and your main animation. Be on the first frame of your demon animation and drag this into the first frame of your main animation…position as you did in PSP and release the mouse. They will all drop into their respective frames.
8. Edit – Duplicate Selected – You should now have 10 frames in all. Holding down your Shift key, select frames 6 to 10. Animation – Reverse Frames and then delete ONLY frame #10.
9. All done? Great! And now to work with DEMON1 set.
10. Back to PSP and start off with step #1 above.
11. Copy merged and paste AFTER frame #9 in AS. Do this by making sure only frame #9 is active and then simply go to Edit – Paste – Paste after current frame. It will be renumbered as frame #10.
12. Edit – Duplicate Selected – repeat this several times until you get to frame #14. You might get extra frames, just delete them as they’re not needed.
13. Hold down the shift key and make sure you select ONLY frames #10 - #14.
14. Go to DEMON1 animation – edit – select all – be on the first frame and drag this into frame #10 of the main animation. Release mouse and everything falls into place.
15. Repeat steps 8 – you’ll end up with 19 frames when done. Delete frame #19.
16. Repeat all we’ve been doing above for the final DEMON 3 set. You should have up to frame #23 when you duplicate the initial time and after selection of all five new frames and duplicating those, you should end up with 28 frames. Remember to delete frame #28 after you’ve reversed them.
17. When you’re finally done, you should have a grand total of 27 frames! Almost done!
18. Back to PSP. Close out all layers except your non-blurred template layer, main tube, word art, text, name and copyright license layers.
19. Copy merged and paste as new animation in AS.
20. Ctrl + L and duplicate this for a total of 27 frames.
21. Using the drag and drop method – drag these frames into the main animation tag. Position as you have in PSP.
22. Animation – Animation Properties – Opaque – White. Animation – Frame Properties – 15.
23. View – animation and you’re all set!
24. Phew. A lot of work, but I hope the results are worth it. Thanks for trying the tutorial!
Please no hotlinking the images! Neither can you use the tags created for your personal use or on blogs or websites without written permission. This tutorial is registered with TWI.
© KiyaSama - all rights preserved. Tutorial Written 18th June, 2009.
Tutorials Home
|
|