
JANESKO SPARKLES
SUPPLIES NEEDED:
[You Must Have Working Knowledge of PSP!]
Paint Shop Pro Vers. 9+
Animation Shop 3
Your tube(s) of choice. Tube(s) used for this particular tutorial is by Jennifer Janesko. You must have a CDO license to use it.
Plug ins
Tramages - Tow the Line
(Go to Liberta Designs to search for appropriate filters)
Brushes (preferably doodle-style or floral) of choice
Sparklies Animation by Hellasweet
Font of Choice or Intima Script
SUPPLIES
REMEMBER TO SAVE OFTEN!
1. Open new raster layer – 650 x 250 – transparent.
2. Open tube of choice and with your picker/dropper tool. Choose two colors – darker shade (set to foreground) and lighter shade (set to background). Go to gradient and choose foreground-background option. Style (Linear) Angle (0) Repeats (0) Invert (ticked).
3. Layers - New layer – floodfill with gradient color.
4. Effects – Tramages – Tow the Line (with default settings) or:
5. Widen your canvas – so you can see beyond the current edges (this makes it easier to do the next step).
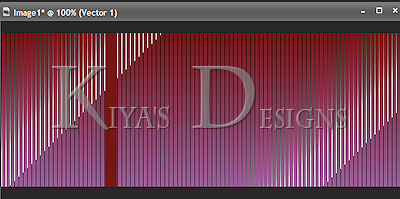
6. Change background color to dark shade from tube. Make foreground Null. Select your rectangle tool and draw out rectangle like so:
7. Convert to raster – duplicate this layer – mirror – merge down. Rename ‘bars’ if you want.
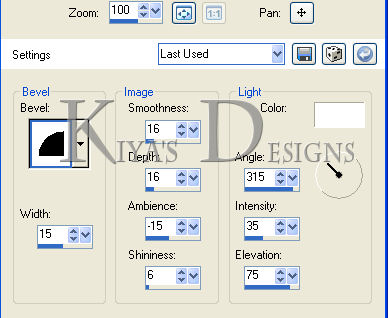
8. Effects – 3D Effects – Inner Bevel with these settings
9. Apply drop shadow of choice.
10. Choose your magic wand – Add(Shift), RGB Value, Tolerance (10) Feather (0). Click between your ‘bars’ – Selections – Modify – Expand by 10. KEEP SELECTED.
11. Create new layer. Move this layer beneath your ‘bars’ layer. Flood fill with lighter shade/color from your tube. Lower opacity to 55%. Image – Adjust – Add/Remove Noise - Noise - Uniform, Monochrome (checked), 25% (DO NOT DESELECT)
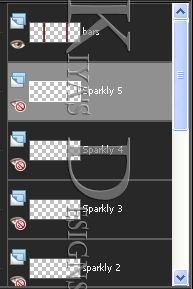
12. Now there are different ways to do this, so I’ll give the quickest way (at least for me). Create five new raster layers – naming each one ‘sparkly 1’, ‘sparkly 2’ etc. etc. Make sure these layers are beneath your ‘bars’ but right above your ‘noise’ layer. You should have something like this when done
13. Close out top four sparkly layers and make the first layer active. Open your stripes animation provided. You’ll notice there are five layers as well. Close out the top four layers of the stripes and make the bottom one active.
14. Go to ‘Patterns’ and choose the stripes pattern – Angle (0) Size (100). Go back to your tag and floodfill ‘Sparkly 1’ with this. Close out ‘Sparkly 1’ and make ‘Sparkly 2’ active. Repeat process for stripes animation (making the second layer active and closing out the first one). HOWEVER, when you go back to Pattern, MAKE SURE you pick the regular stripes pattern instead of picking the one that says ‘current’ (if you choose current, you’re just repeating the same animation used before).
15. Repeat Step 14 until all five Sparkly layers are floodfilled with the animation. NOW you can deselect.
16. Make your ‘bars’ layer active. Copy and paste your tube. Resize if needed and position to the left or right of one of the bars (see tag for reference). Duplicate and merge down. Duplicate tube – Adjust – Blur – Gaussian Blur (5) – Layer blend (Hard Light – lower opacity by 70%). Merge down.
17. Make your ‘tow-the-line’ layer active. Create new raster layer. Using a dark/light color from tube, apply your brushes at edges of tag (see above for reference).
18. Make your top layer active. New raster layer. Selections – Select All – Modify – Contract (5) – Invert – floodfill with light (or dark – your choice) color from tube.
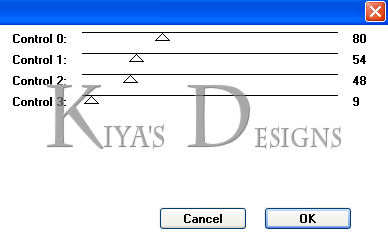
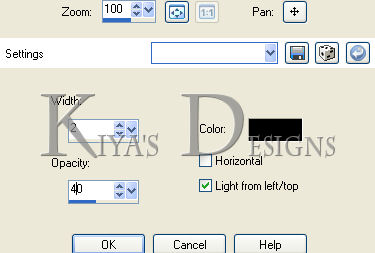
19. Effects – Textures – Blinds –
20. Apply drop shadow of choice.
21. Type in your text and position where you like. Also type in your copyright and license info.
ANIMATION TIME:
1. Open up Animation Shop.
2. Back to PSP. Make sure top four layers of stripes animation is closed out. Copy merged and paste as New Animation in AS.
3. Back to PSP. Close out Sparkly 1 layer. Make Sparkly 2 layer active (visible). Copy merged and paste AFTER Current Frame in AS.
4. Repeat above step for the next three Sparkly layers and when done, you should have FIVE frames in Animation Shop.
5. View – Animation – and if you’re satisfied with what you see, save as .gif file and you’re all set.
6. Hope it was fun for you, and I’d love to see your results!
Please no hotlinking the images! Neither can you use the tags created for your personal use or on blogs or websites without written permission. This tutorial is registered with TWI.
© KiyaSama - all rights preserved. Tutorial Written 13th January 2011.
Tutorials Home
|
|